

Since the release of MTG Avatar, we’ve seen numerous unique archetypes pop up in Standard. From simple tempo shells like Azorius Flash to convoluted combo decks such as Bant Airbending, there are plenty of new strategies for players to flock to.
Our pick for the most intriguing of the bunch has to go to a sweet Golgari Earthbend shell with an infinite damage combo finish that just boasted a top eight Standard Challenge finish. While similar combo ideas were floating around during spoiler season, this decklist is refined and robust, and its impressive performance showcases that it has what it takes to compete with the best that Standard has to offer.
Executing the Combo
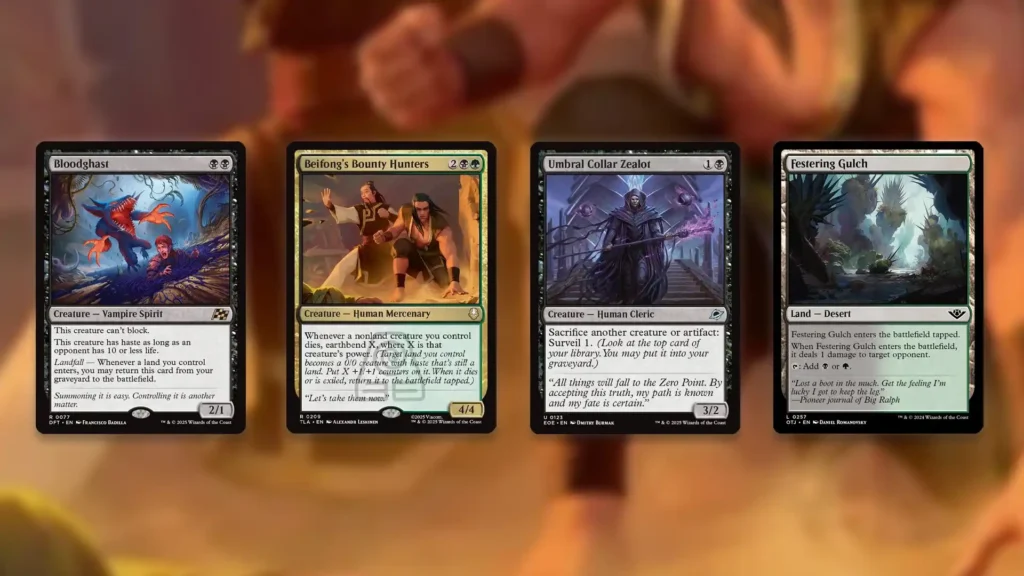
This deck’s exciting combo finish revolves around the new powerhouse, Beifong’s Bounty Hunters. As a four-mana 4/4 that lets you Earthbend 4 when it dies, this tool is already a reasonable threat on its own. Once you incorporate some sacrifice synergies, however, it becomes a monumental threat with the potential to end the game on the spot.
This is where Umbral Collar Zealot and Bloodghast enter the equation. With all these two cards in play alongside Hunters, you’re able to produce an infinite sacrifice loop by executing the following steps:
- Sacrifice Bloodghast to Umbral Collar Zealot’s ability, triggering Beifong’s Bounty Hunters
- Put two +1/+1 counters on one of your lands
- Sacrifice that land to Umbral Collar Zealot’s ability, triggering its return to the battlefield
- When the land reenters, Bloodghast will trigger from the graveyard
- Return Bloodghast to play
- Repeat steps one through five over and over
While this loop does technically set up infinite Surveils via Zealot, it doesn’t quite win you the game without a bit of help. Luckily, there are a multitude of cards that can fill the final slot needed to close out the game. The simplest option is simply to start the sacrifice loop with Festering Gulch in play. That way, you can Earthbend onto that land specifically, and every time it returns to play you’ll ping your opponent for one damage.
In the case where you don’t have your trusty Desert on the battlefield, Sephiroth, Fabled Soldier can fill a similar role, draining your opponent of all their life as you continue sacrificing Bloodghast repeatedly. If neither of these lines is available but you have a copy of Scavenger’s Talent in play, getting it to Level 2 before starting the loop allows you to Mill your opponent’s entire library. Even simply having Dredger’s Insight in play at the start of your turn makes it easy to gain infinite life as Bloodghast keeps entering and exiting your graveyard.
What’s nice about those last two options is that they naturally add consistency to your gameplan in addition to functioning as win conditions. Level 2 of Scavenger’s Talent gives you the choice to Mill yourself in search of Bloodghast via Level 2, and then Level 3 works to resurrect either of your other missing combo pieces. Likewise, Dredger’s Insight fuels your graveyard and digs for your combo pieces in an efficient manner when it enters. Add Lively Dirge into the mix as a tutor and reanimation hybrid spell, and you’ve got a reliable combo on your hands!
Speeding Up the Process
As good as this deck is at finding its combo elements, though, none of that matters if you’re getting run over by Simic Aggro or Mono-Red Aggro before you can assemble everything. You won’t always have Zealot and Hunters in your opening, and even though Scavenger’s Talent and Dredger’s Insight do a good job finding your missing pieces, doing so takes time. The good news is that this deck features a handful of early plays that work to make your draws more explosive.
Unsurprisingly, both Llanowar Elves and Gene Pollinator are your strongest options in the one-drop slot. Being able to accelerate out Hunters ahead of schedule is a big deal against aggro decks, since it gives you a sea of blockers to buy you time if left unchecked.
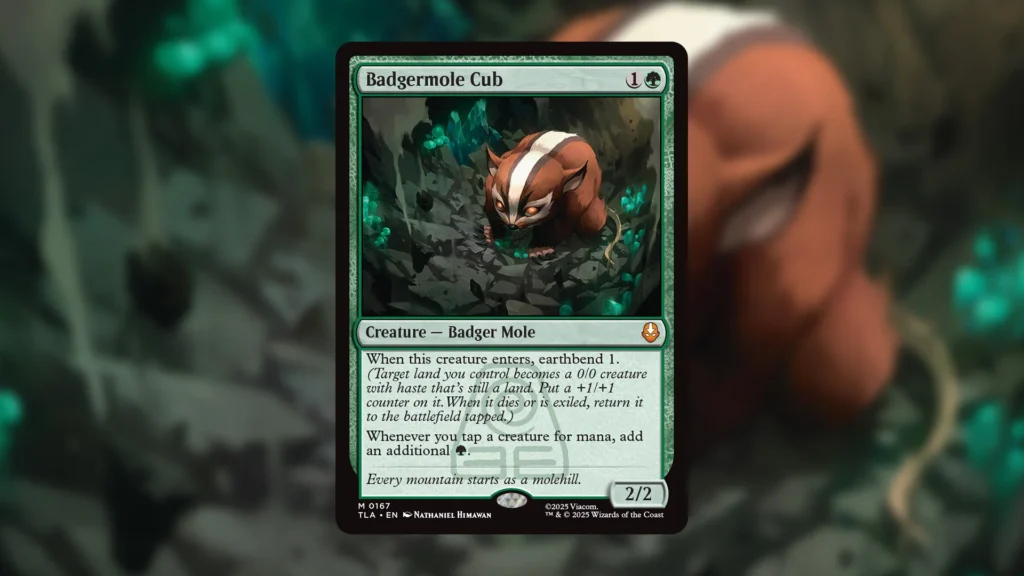
These mana dorks also synergize perfectly with Badgermole Cub, which has proven to be an unbelievable accelerant in multiple formats. Between Leveling up Scavenger’s Talent, utilizing all modes on Lively Dirge, and hard casting Overlord of the Balemurk, you’ll rarely run out of ways to spend your extra mana. Plus, later in the game, sacrificing extra mana producers to feed Sephiroth and churn through your deck is a totally fine exchange. All of your cards synergize very well with each other, which is part of what makes the deck so hard to play against.
Sidestepping Hate

Between the deck’s explosive potential and ability to rebuild in the face of removal, this shell isn’t the easiest to fight against. Decks like Simic Aggro that lack the interaction necessary to break up the combo once it’s assembled will struggle to race your elite draws. At the same time, the value you generate from Hunters and Scavenger’s Talent gives you a good chance to out-grind Dimir Midrange. Not to mention, simply abusing Bloodghast as a recursive threat means you’ll be able to win some games against midrange and control shells through traditional combat, without ever putting together a combo victory.
The reality is, the backup plan of just attacking your opponents to death is quite real and gives the deck a layer of extra resiliency in the face of hate cards. As a dedicated graveyard-centric archetype, naturally, your combo is weak to Rest in Peace. Yet, if you expect your opponent to be packing hate in their sideboard, bringing in a playset of Ouroboroid in games two and three lets you win on a more traditional access that they might not be prepared to beat.
This doesn’t mean that this archetype is foolproof, since a healthy mix of hate pieces and board wipes out of control will often be enough to beat you. Rather, this deck’s versatility provides multiple paths to victory that your opponent needs to account for. This elite performance may just be the beginning of a bright future for Magic’s next up and coming combo deck.
Stick with us here at mtgrocks.com: the best site for Magic: The Gathering coverage. Be sure to check out our deckbuilder for your next big brew!